The purpose of the Staging Deployment Slot
Thursday, February 28, 2013
by asalvo
Update: 3/17/2017
Someone left a comment today which had some good information about staging slots for Azure App Services (Web Sites). According to a quick google search, Azure Websites did not launch until June of 2013, 3 months after I wrote this post, and they did not have staging slots when they launched. But since people are obviously still coming across this post, I wanted to add this update so it's clear I'm talking about the older Azure Cloud Services.
I was asked today, “how do you change the configuration of your cloud service when you swap between staging and production slots?”. My short reply was, “You are not using the staging and deployment slots of Azure cloud services as they were intended”.
Background
In a Windows Azure Cloud service, you have two deployment slots, production and staging. In most application environments, you usually have a staging environment, and a production environment (along with development and QA environments). When I first saw the staging and deployment slots in Azure Cloud Services, I didn’t understand that the staging deployment slot is not the same as a staging environment.
The staging deployment slot allows you to stage a deployment to a given cloud service, which in turn allows you to:
- Deploy an update to your Azure Cloud Service using the same number of role instances you are currently running in the production slot
- Validate that the deployment was successful
- Validate that the new version passes a basic set of smoke tests (i.e. is your configuration setup correctly).
- Quickly failback to the previous version if a serious bug is discovered (work stoppage type bug/issue).
The staging slot is not meant for long term testing and validation. While you can leave the staging instances running forever in case you need to swap back, this was the intention of the design.
Note: When you have something running in the staging slot, you are charge the same hourly rate as you do when you have something in the production slot. You don’t get to deploy to the staging slot for free.
So what’s the “right” way?
Instead of trying to use the staging deployment slot for something it was not intended for, you should setup multiple cloud services, one for each environment to support your organization’s Application Lifecycle.
In Figure 1, you can see an example of 2 separate Asp.Net applications, each with a development and staging environment. Each environment maps to a single cloud service, and each cloud service has a production and staging slot.
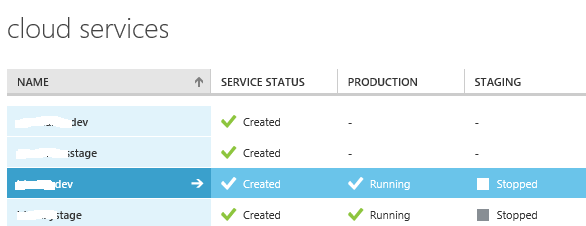
Figure 1: 2 Sets of Environments each with it’s own set of deployment slots.
Our application Lifecycle is as follows:
- Developers work locally using Visual Studio and the development fabric
- Continuously deploy to the development cloud service whenever a new change is checked into source control (15 minute batches). Our CI process includes a full suite of unit and integration tests.
- We deploy to the staging slot to ensure the deployment is successful
- Immediately perform a VIP swap
- Delete the staging slot to avoid being charged
- Nightly automated functional testing is performed against the development environment
- When features are complete, they are merged to our staging branch and then deployed to the staging cloud service. We follow the same deployment process as in development. If the deployment fails or a nasty bug is found we can just redeploy the previous version since we save our cloud packages.
- At the end of the sprint, we perform a deployment to our production cloud service
- The deployment begins by deploying the same cloud package which was last deployed to the staging cloud service (but with the staging configuration) and signed off on. This package is deployed to the production cloud service’s staging slot, but with the production configuration.
- Once deployed to the staging slot, we verify the application is running correctly. We do not do comprehensive testing, this should have been done in the staging cloud service.
- Swap the VIP, promoting the code deployed to the staging slot to the production slot.
- Monitor the application. In the unlikely event that a show stopper issue is raised, we can swap back. However, the longer the new code is running in the production slot, the less likely we are to swap back, since that action could introduce a even more serious issue.
- Delete the staging slot instances
- If a bug is found, and it’s deemed to be of a high enough priority that it can’t wait for the next regularly scheduled deployment (2 weeks), we can create a hotfix and deploy it immediately. Since our deployments are all automated, we can deploy the hotfix to the staging cloud service to test, then deploy to the production cloud service.
Alternative Deployment Method
You can directly deploy to the production slot of a Azure Cloud Service. If you have more then one role instance (you are running multiple role instances to get the stated SLA right?), Azure will automatically upgrade each role instance independently of one another.
While this saves you a little bit of money by not deploying to the staging slot, we found the staging slot deployment to to work with our continuous integration strategy better. And when it comes time for deployment to our Staging and Production environments, we liked the ability to validate the deployment.
Summary
The staging deployment slot of a Azure cloud service is not meant to serve as a staging environment. You should use separate cloud services and promote the same cloud package (cspkg) from the staging cloud service to the production cloud service, specifying the appropriate cloud configuration (cscfg). Remember, if you are used to having separate environments for your Application Lifecycle, you should use separate cloud services in Azure.